Pages

Tuesday, January 3, 2012

Using diagrams to explain force and motion....


Q:  What can we notice about the motion of the marble on the roller coaster tube?


            1. Explain:  Share the concept of forces and motion using a United Streaming video clip or using a nonfiction text.  I like to use snippets from United Streaming to show a real roller coaster in motion.  The kids get a "Wow" factor and an immediate hook....

            2. Label a diagram of a roller coaster to show: 

            *marble’s position (near the top, traveling down, etc…)

            *force – push or pull (we use a push to start the marble, then gravity pulls it along)

            *motion – how the marble moves (up, down, forward, backward)

This may seem "elementary" but many kids do not connect the science behind the "fun" until they draw it out on a diagram in their notebooks.

I don't know if you can see, but this student wrote all the key words for direction up, forward, down, stop - but never connected it to the vocabulary term motion.  He also didn't write anything about force.  This example is one that shows me he is "having fun", but maybe not connecting the science to the activity.  Intervention is needed here....


This student, on the other hand, uses the correct terms of motion as well as push and pull for force.  She included a key with blue to show force and red to show motion. This shows me she is connecting the science terms to the activity.

            3. Explore:  spend some time exploring with the roller-coasters again using the correct vocabulary of position, forces and motion.  


So much fun....love it!

Exploring with Rollercoaster tubes


What can we learn about force and motion by creating our own roller coasters?

Today, students will work in their science groups.  Getter one will get the materials – tube, a cup, tape and a marble. The cup is important because it catches the marble at the end of the run.   The starter will begin to explore with the tubes for a while to see what the group can do… Can they make a loop? A curve? A drop? 

           Extend:  Pass out a challenge sheet (from More Picture Perfect Science lessons)  with several challenges to attempt to try in their exploration. Can you move a marble to the cup using one loop? a twist? etc???  Getter two will clean up when the time is over and the Reporter will share what the group was able to do.  The science jobs is an extremely important part of any cooperative group activity because roles are defined and arguing over who does what is not an issue. 


How to introduce Force and Motion?


Today we are starting a new unit on Force and Motion.  I start by having them turn in their science notebook page to the next clean page and write a title page – Force and Motion.  Then they need to go to the table of contents to place what number this new unit starts on. 

            What do you know about Force and Motion? I believe one of the best ways of knowing what kids are actually thinking is to ask them what they already know (or think they know).
 I will Pass out 12 X 18 paper  to each table (four sheets total) and have the kids brainstorm what they know about force and motion.  They will work on this for about 15 minutes and then have each group share out what they know.
            What am I looking for?  I am looking to see if students remember that a force is either a push or a pull, simple machines can make the work easier, that motion is a change in position of an object with respect to time and acurate examples of force and motion in their lives.
            What else am I looking for?  I am looking for misconceptions, misunderstandings and ideas that need to be corrected before we can go further. 

            For last 10 minutes, have the kids draw pictures around the title in their notebook to show ideas about force and motion.

* I wish I had samples to show, but am home on surgery leave still so have no access to student work.  Only a few more days at home....yay.

Monday, January 2, 2012

Force and Motion

How do you start in fourth grade to introduce force and motion? Here in Virginia they have been exposed to this concept in k-1 learning about pushes and pulls related to toys, then in 2 expanding to pushes/pulls as related to magnets, and then in 3rd grade related to simple machines.  Where do we go from there?

Here are our State Required Standards:
SOL Standard 4.2

The student will investigate and understand characteristics and interaction of moving objects. Key concepts include

a)      motion is described by an object’s direction and speed;

b)      forces cause changes in motion;

c)      friction is a force that opposes motion; and

d)     moving objects have kinetic energy.


So...how do I break it down..so that it is interesting and meaningful to my students?


Part One:  Force/Motion with Roller coasters:

·         describe the position of an object (by location to another object or background)

·         collect and display data in a table and line graph to show time and position data for a moving object

·         explain that speed is a measure of motion

·         interpret data to determine if the speed of an object is increasing, decreasing, or remaining the same

·         identify the forces that cause an object’s motion

·         describe the direction of an object’s motion: up, down, forward, backward

·         infer that objects have kinetic energy

                        Part Two:  Mass and Friction with Cars

·         design an investigation to test:  “If the mass of an object increases, then the force needed to move it will increase.”

·         design an investigation to determine the effect of friction on moving objects:  write a hypothesis, identify dependent variable; independent variable, and constants.  Conduct a fair test, collect and record the data, analyze the data and report the results of the data

What do we need for part one?  Roller coaster tubes - I got this idea from More Picture Perfect Science Lessons.  They have a great lesson in there that I use as the "hook" for my unit.

Go to the local Lowes or Home Depot and buy some hose insulation tubing.  They are super cheap...I think I spent $10 total and had enough for the class. 

They look like this:

Then you will cut them in half - so that they are the same length but have an opening on top.

   The only other materials you will need are marbles, cups, tape and maybe some toilet paper tubes for tunnels.  More information to come...

Sunday, January 1, 2012

New Year..new blog

Today I am launching a new blog....Virginia Studies Gal.  My first love will always be science and this will still be my primary blog...BUT, I wanted a place to share the projects, PowerPoints and lesson plans we have developed for Virginia Studies as well..

If you live in Virginia and teach fourth grade, please visit...

http://sciencegal-virginiastudiesgal.blogspot.com/

Fondly,

Saturday, December 31, 2011

Quick Checks for formative assessment...


I am on another vacation this weekend..this time to celebrate the wedding of my fourth grade colleague Joe Curtin! So, I peeked back through my posts and picked an oldie but a goodie that I posted back in December.  Enjoy!


I am all about authentic assessments. I want to peer into the child's mind and see what she or he really understands about a concept that I have taught.  However, one of the drawbacks to this is TIME.  It takes time to check work and make comments and provide appropriate feedback.  Right?

This fall I was introduced to a new element of formative instruction that will be implemented in all the FOSS 3rd edition NEW units.  I sat with my jaw wide open as I thought...this is what I've been waiting for. So let me tell you how it's done!


Step one:  When you are teaching a lesson, pick out one or two main concepts that you want them to understand.  Write them on the sheet I have provided for FREE in google docs. (right under the Teachers Pay Teachers link)

Step two: Design in your lesson a way for the students to explain what they learned at the end of the day.  Suggestions include:  answer the focus question based on what you learned today, do a 3,2,1 reflection, a reflection such as Today I learned.... (make sure you tell them to write about the concept you are checking) or a simple Quick Write to explain the concept.

Step Three:  After teaching the lesson, have the students turn in their science notebooks open to the page they were working on.  Research has shown that this saves 25 minutes of teacher time - looking for the correct page to check! I also make sure that I have all journals turned in before I grade.  This is important for the next step.

Step Four: Read the reflection pieces.  If the student "gets it", then you only need to mark with a check. If they do not get it, then you write down what they made an error on so that you can get in touch with them tomorrow and clear up the misunderstanding.

The Formative Assessment sheet will look like this:


Quick check Assessment for Science Notebooks

Date:___________________________

Concept
A force can be a push or a pull
Got it!
√√√√√
Needs support
Brian – forces can only be a push
Cindy – pushes cause the force


I absolutely love this formative assessment technique because it keeps me on track.  I am able to check in with kids who may not understand a lesson quickly instead of waiting until the final test to see they didn't get it at all. 

I have used this technique in Math, Reading, and Social Studies as well.  It is a great way to keep track of your student's learning in all subjects.


Thursday, December 29, 2011

Clouds in the sky...oh my!

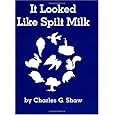
Product DetailsI just love to look at the clouds....laying on my back and staring overhead for hours at the shapes in the sky....One of my favorite books is It Looked Like Spilt Milk  .  This book take the imagination route of looking at white shapes and imagining they are a birthday cake, a tree, a bunny...but all in all they are just a cloud in the sky.  This book is a great hook at any age!

With my Seeds of Science Weather and Water unit, we spend a lot of time looking at cloud cover and analyzing what type of precipitation they create.  We learn where these cloud form in the sky and how much humidity is involved in each one.

But eventually, we need to learn the official names of the clouds for our Virginia SOLS.  So I created a matching game where the kids have to match the picture and name to the description of the cloud.

You can download it for FREE in the Google Docs page.

Also, one of my "fans" took the what do you wonder about weather and turned it into a PowerPoint.  You can also download it for FREE in the Google Docs Page on the side.

To find the Google Docs - it is on the side bar....scroll down....Under the Teacher's Pay Teachers link and above Education Journey. Good luck!