Pages

Wednesday, March 28, 2012

Comparing pound and ounces

This is a great lesson that we found through one of our resources at school called Math Buddies.  It is a prepacked kit with manipulatives, games and lesson plans all packaged up together to use for tutoring or intervention groups.  Sometimes, we use activities from it for the whole class....like this

Visual Model

How much is a pound?

Start off with a 8 X 2 inch paper strip.
This represents a pound.
Then fold it 1/2, then in 1/4, then in 1/8ths and finally in 1/16ths.
Label each section -   oz.  And record in your science notebook!


Tuesday, March 27, 2012

How much IS a kilogram????

So today, we moved from simple grams to an actual kilo-gram.  This is one of my favorite FOSS lessons because it is actually building a kilogram unit using rocks!  The students will work as a team to create 10 bags with 100 grams of rocks in each bag.  I have five science groups, therefore each team is responsible for creating two bags filled with 100 grams of rocks.


As each team filled the bags with rocks, they were able to put gram stackers on the other side of the balance scale to equal 100 grams.  The kids really enjoyed this because they had to be precise in their measurements.

Next, we put all ten bags together into one gallon sized bag. I also had a kilogram weight that we passed around so that the kids could feel the weight of a kg vs. the weight of a gram.

It was a good connection to count each bag by 100's until we had all 10 bags which equaled 1,000.   I think having this visual model is important because mass is one of those units that can be hard to visualize - you can't see it like linear or even capacity; you have to feel it.


Monday, March 26, 2012

Measuring mass....

Our measurement unit continues and this week we are on to mass.  We started with the gram unit and used our gram stackers to measure three small units - a wood chip, a washer and a tile.  At first, we felt the mass in our hands and tried to put them in order from heaviest to lightest.  This lesson comes from Measuring Matter the newest FOSS kit.


Then we actually weighed them and recorded the mass in our notebook. It's a simple way to start, but sometimes that is the best way to make sense of mass.


You can see the set up of our science notebook really well in this entry:

Focus Question:
Data - trial one and trial two
Conclusion


Next, we were able to put the steps in order to show how to measure mass using a balance scale.

I think these lessons are simple in nature and therefore make an impact on our students.  When you teach measurement, it is so easy to teach it through worksheets and center games.  Don't forget to actually get out there and measure real objects!!!  Just saying.....


Sunday, March 25, 2012

Connecting Science with Read Alouds....

Somehow I find the time to connect science into every part of my day....I guess it's my passion and it overflows into all areas!

Right now we are reading Owl in the Shower  by Jean Craighead George.  It is an excellent story about the fate of an owl after a logging company has clear cut the land in the Northwest.  It is told covering the points of view of the owl (sort of), the logger (Leon) and the tree huggers (the teacher! ha ha). My students and I are familiar with owls living in Virginia, but not with the controversy surrounding the spotted owl out west.  The book is full of great vocabulary, interesting points of view, funny owl stories and lots of true facts. We have loved every minute of it!

As I have been reading it, I started a vocabulary chart to post in the room.  I ask the kids to remember three interesting words from the day's read aloud that we may need to discuss and add to our wall.  We have also added picture of the barred owl (Bardy in the story) as well as the spotted owl.  This is a great visual for discussion as well!

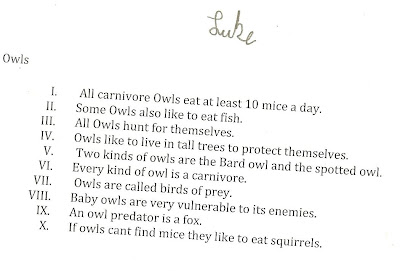
Recently, I decided to have the students do a Quick write to share what they had learned about owls from the book. We were fortunate to have the ibooks visiting in our classroom for the day and so they pleaded with me to let them type the quick writes out. No argument here!

Here are a few samples.  I always find it interesting to see how each child personalizes their typing with fonts - some choose very linear and traditional fonts while others choose more "fun" fonts!


Tuesday, March 20, 2012

How do you recognize parts of an inch?


Here in Virginia our studnets need to know how to measure a picture to the nearest inch, 1/2 inch, 1/4 inch and 1/8 of an inch.  How do we teach it? Let me show you....

First we started by passing out inch rulers and drawing three inch lines. 
Then we divided one line in half, one line in fourths and one line in eigths.  Then we colored each section to show size. It looked like this in their science notebooks.


Part two - we went outside to our school garden in search of objects that were less than one inch.  The students had so much fun measuring objects in nature and recording them in their science notebooks.


They found a ladybug that was about 1/8 of an inch.

Here is a sample of the notebook entries from one child....

I don't know if you can read it, but it says A growing white flower (1/8 of an inch).

A pebble (1/4) of an inch.

The inside of a yellow flower (the stigma) 1/4 of an inch

Ant = Half an inch 

Monday, March 19, 2012

Benchmark Meaurements for Length

Like I've stated before, we jam too much information into our students heads...I think it is extremely valuable to teach our students how to measure in length, capacity and by mass.  However, do they really need to remember benchmarks for estimating and coversions between units??? 

Regardless, we teach it....so here is an idea my team came up with.  We decided to make a chart to show benchmark measurements for length...complete with visuals.


Another thing we have to teach is how to convert within US Standard and within Metric as well as between the two.  One way to do this is also with an anchor chart to refer back to when you are really measuring items in the class room.   Here is a FREEBIE to record measurements of things in your classrooms in inches, yards and feet. Grab it here for free!


Saturday, March 17, 2012

Vocab Strategy - embed it in science!

My reading specialist just spoke with the staff about language development. My school is a typical suburban school where we have many economic ranges.  However, lately our lower economic level has increased.  With poverty, comes delays in language.  Traditional methods of teaching vocabulary doesn't work very well for most of those students.  What does work?  Embedding language into your content area. 

So when do you teach content vocabulary? Many teachers think they need to teach words before the encounter them.  But, research has shown that students really remember words better if they have the experience first and learn the words as they go.  Think about how toddlers learn words? As they go...when you see a bird, you say "Look at the bird."  You don't teach them bird without a bird nearby, that would be crazy.  So why do we do that in school?

Here are a few strategies that I feel are the most beneficial...

I know you have heard me say before how important I still feel word cards are in the upper grades.  Having a pocket chart with words you can pull out and carry around the room while you teach is a great strategy.  Another strategy that works is creating anchor charts with removable word cards to fill in like a cloze activity.


Of course, the most useful tool in any science classroom is using a science notebook.  In these notebooks, students can predict, plan, organize thoughts, reflect, draw diagrams and label words in a meaningful context.  As we learn we write and reflect with language...and at the end of a lesson, we may go back and highlight or circle specific content words that they need to know in different colors.  We add these words to our vocab charts and then use them in real world situations in our class....that's meaningful.  

Friday, March 16, 2012

Upper Grade Linky Party


Just stopping by to let you know about an awesome Linky Party! Lorraine over at Fabulous 4th Grade Froggies is having a Linky Party for 3rd, 4th, and 5th grade bloggers! It's a fantastic opportunity for intermediate teachers to link up! It also provides a place where new bloggers and blog-hoppers can go to find great resources for their upper grade classrooms! Be sure and stop by, link up, and visit!


Here's a great example of a time saver that I picked up from a FOSS assessment workshop.  Research has shown that teachers can cut down at least half the time of checking notebooks IF students turn in their notebooks stacked and turned to the page to check.  It is true!  I never realized how much time it takes to actually flip through the pages in search of the assignment!  So now, my students are trained to turn in their notebooks this way!

Thursday, March 15, 2012

Measurement with meters

Boy...are our standards confusing!  My team and I have spent quite a bit of time gathering activities that are hands-on, content rich and cover the standards for Virginia.  Are you as frustrated as we are about the multitude of measurement info that we bombard our students with?   We have been working on length and need our students to understand....Metric units (mm, cm, m and km) as well as their relationship to US Standard Units (1/2, 1/4, 1/8 of an inch, foot, yard, mile).  Phew it is confusing!

This week we did several activities...including the setting the need for a standard with different sized straws as well as measuring things around the room with centimeters.  Both of these activities are from FOSS's Measurement kit and the new 3rd edition Measurement and Matter kit. 

I love the meter stick that we make with this unit.  You can find it for FREE here... along with all the other worksheets for the unit!


The kids can each make their own and it is easy to use in the classroom, outside or at home!


Hope you can use this resource!

Monday, March 12, 2012

What do you wonder...springtime!

Do your kids know how to wonder? Ah...the joy of wondering without having to have a right or wrong answer...My sons and I have spent many wonderful afternoons laying in the grass and wondering about nature. You know...so many of our kids don't spend much time outside, much less talking about what they see with an adult. So I have tried to "fake it" by adding it into my classroom.


I started this winter with some picture images that they could "write" about for morning work. One of my blogstalkers suggested I turn it into a powerpoint...which I thought was an excellent idea. Now, I can pop it on the screen and we can chat about it over several days - one slide a day works great. We look at a picture and make several predictions and give our own opinions about what is going on.

This picture of the boys is one of my new favorites...after I show many pictures of nature including flowers, bees, bunnies, rain, pollen, etc... I end with this picture and state "Why do you think they are smiling???" Just imagine what our kids would say - because they won the game, or maybe just because they are good friends and have fun playing together, or maybe one said something silly, or maybe they just got ice cream....the possibilities are endless. I hope you will grab this powerpoint for Free and then, get outside and WONDER.....