Pages

Saturday, December 29, 2012

Vocabulary Connections

If you have ever read my blog before, you know that I am passionate about including vocabulary connections in my science classroom.  What you may not know, is that I am passionate about including natural vocabulary connections in all curricular areas! 

For the past several years, with the help of my wonderful mentor Kip Bisignano from Delta Education, I have implemented these strategies into my classroom. What has been the result?  Well, not only have my science scores risen but my math, reading and social studies scores have risen as well.  I am NOT putting more time into reading instruction - but instead am putting more reading, language and writing into my content areas.  One hour is enough for guided reading!

In thinking about the new year, I thought it would be great to have a planning guide with proven structures listed and ready for me to pull from and plan.  I have created a list of 20 tried and true structures, many of which I have already blogged about.  For the ones I haven't yet blogged about, well...look for them in the future!

The actual planning sheet includes a spot for the topic you are teaching.  For example, the next topic we are teaching is force and motion.  I would write that general topic in the star. 
Next, I would purposefully plan what content words I would teach - like push, pull, gravity, speed, acceleration, deceleration, stop.  Third, there is a spot for Science Process words or Critical thinking.  We always compare and contrast in this unit as well as predict, conclude and observe.  I included Related Books to remind myself to read "Rollercoaster" by Maria Frazee as well as other nonfiction books.

The last box is the place where I can dump my ideas for connections to the topic - word wall, guess my word game for morning meeting, concept maps, jigsaw activities for reading nonfiction text to clarify force and motion concepts, drawing diagrams of a roller coaster to label where we see forces at work, and highlighting vocabulary words in our science notebook itself. 

I hope you can use this FREE resource for many lessons - not just in science.  Please drop me a note to let me know if you used it and how it worked for you!


Comment:

Thursday, December 27, 2012

Bird Treats for the Winter

Just before Christmas break, we spent some time creating bird feeders for our local birds.  Let me warn you...it did create a MESS on the floor.  However, my students were wonderful helpers with the clean up and graciously borrowed brooms from other classes to sweep it all up in no time!

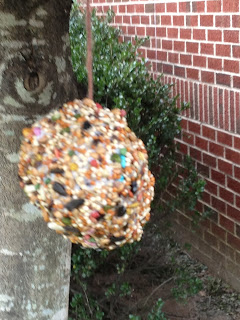
Here's what we started with:


We made two bird feeders.  The first one was the typical pinecone feeder with a twist.  Because so many students have peanut allergies, I couldn't use peanut butter as the spread.  Instead we used shortening - generic for crisco. The crisco was much cheaper than peanut butter too!!! The students started with yarn and tied it around the pinecone, spread crisco on the cone and then dipped it in the birdseed. 

 
The next one was really fun...old fashioned popcorn strings with a twist!
Instead of using thread and a needle, we used wire from the craft store.  The kids could easily string the popcorn on the wire and no risk of getting cut!


Parents sent in popped corn for us to use.  They sent in a ton of popcorn!
 
After we finished, we took them outside and hung them on our local trees for winter break.


Hope you can use this too!
 
 
Comment:
 

Monday, December 17, 2012

Watershed Models

Do you build models of the watershed in your classroom? As part of our unit on natural resources, we teach students the importance of watersheds, forests, and mineral resources.  We are responsible for teaching the students about what a watershed is and how humans impact it.

So to start, we teach students what a watershed is.  They are all familiar with the water cycle model.  I use this to start as they can connect what they already know to something new.  When looking at this model I point out that water runs downhill towards a body of water.  When they ask, what about the water that just soaks into the ground - I remind them of ground water. Where I live we don't have city water - not even at our school!  We are very familiar with well systems...so they understand that there is water underground.

Next I want them to learn that a watershed is land. We all live in a watershed. A watershed is simply an area of land that leads to a body of water.  In Virginia where I live, we lived in the Rappahannock watershed that leads to an even bigger Chesapeake Bay watershed.  Because we often mention the river or bay connected to the watershed, students often think a watershed is a water source.  This is a common misconception, even with adults. 

So to help them see the land is the watershed that leads to the water source, I tried this experiment.  I found this idea while previewing the FivePonds science text book. I think this idea is genius! 

Materials:  Potting soil, text books (for stacking), paint liners ($1 each at Lowes) and water.

This model was easy to create.  It was cheap enough for me to purchase 5 - one for each group.  The students built up the soil in the paint liner and stacked one side with books.  There is already a built in collection pool (for the paint) where the water will run and collect.
 
My students were able to observe what happens when it "rains" on the watershed.
 
They noticed that the water "pushed" soil with it when it was flowing.
 
 
It was a great introduction to the watershed.  Some other ideas for extension would be to grow grass in one pan and compare what happens with grass and without grass. This would give them a visual of a true Riparian Buffer. 
 
I will also include some excellent watershed videos:


Comment:

Sunday, December 16, 2012

A day to remember


Comment:
My Heart breaks for the parents, the children and the staff at Sandy Hook Elementary.

God Bless them...


Tuesday, December 11, 2012

Freddy the Fish...water quality

Back into my classroom....we are learning about watersheds.  Boy have we had fun! One of the activities that I love is the Freddy the Fish Story from the WUP center in Michigan.  In this activity, you read aloud a story about Freddy the Fish (see the green sponge?) and his travels down the watershed.  He starts in a nice cool, clean stream.  As he travels he encounters all sorts of pollution - from too much sediment, to litter, fertilizer, etc..
The materials you pour into the tank are easy to find at home and are earth friendly for when you pour the water out as well.  We used Koolaid mix, basil, syrup, coffee sludge, soil, etc...
The students really enjoyed this demonstration and were able to visualize the effects humans have on water quality.  When we were finished, the students then went back to their science notebooks and drew a picture of before and after.  They were able to add their opinions as well as noted observations about the quality of water and the effect on Freddy (he dies, by the way!).
Great lesson!
Comment:

Tuesday, December 4, 2012

Creating Concept Maps to Review for an end of unit test

We just finished our weather unit....we learned a lot about fronts, clouds, weather data, etc...It was time to test.  I don't know about you...but, how many jeopardy games can you play to review? Also...are you reviewing at a higher level or just basic recall?

I had learned this concept from FOSS last year and was looking for the perfect opportunity to use it in the classroom.

Building Concept Maps:  

First we got into our science groups.  I gave each group a pack of sticky notes and a piece of large chart paper.

Next, I asked them to brainstorm as many weather words as they could think of - they were allowed to use their notebooks and study guide as a resource (part of my thinking was to get them used to using resources to study).


After 5 minutes...I stopped and modeled how to create a concept map.  As you can see on the side, I took my sticky notes and put them on the chart while drawing arrows and connecting the words together. We talked about what words were similar or different.  We talked about cause and effect.  We even talked about compare and contrast!  This was turning out to be much higher level thinking during the review process!


Here are a few of the finished products.  We hung them in the hall for a week (until the sticky notes lost their stickiness and fell to the ground!)


Comment:

Saturday, December 1, 2012

Creating Catapults

This is another engaging after school activity that we used in our Force and Motion science club.  It would be easy to add to your existing curriculum; especially if you teach the FOSS Variables kit. 

In the Variables Kit, there are four problems for students to explore and test variable - pendulums, penny boats, planes and flippers.  Flippers are really catapults that you can change the height of the object's trajectory path by changing the length of the flipper. 


Another great FREE game from FOSS is the Blasto Game. This goes right along with the idea of changing variables to further your flight. It is an interactive computer game that the kids will LOVE...

To follow up this activity, we had the students design and create their own catapults - using simple materials:

  •  a paper bowl
  •  1 or 2 plastic spoons
  •  1 or 2 rubber bands
  • 12- 16  inches of tape
  •  3-4 straws
  • 3-4 Popsicle sticks
  • mini marshmallows (the ammunition)


And off course...we had to write about our designs with a diagram to show how they worked!


Comment:

Saturday, November 24, 2012

Cross Curricular Language Arts Connections

Do you feel like you are running on a hamster wheel?  Do you feel like we are working harder and not smarter?  One of the ideas that I have grasped onto over the past few years is the idea of a "curriculum economy".  We have soooooo many things to teach and so little time.  We try to teach random discrete skills and it is overwhelming to us and confusing to the kids...right???

My FOSS representative, Kip Bisignano introduced me to the concept of infusing my language arts skills into my content area.  After all, our principal wants us to teach reading/language arts for 90 minutes or more at the detriment of our science or social studies instructional time. Guess what happened?  My reading scores went from mid 70% to 94% (three years in a row!).

I have created a new packet of activities that you can use to imbed language into your science class around the topic of weather.  I am charging for this one because it is 27 pages of stuff you can use!  (Besides it took me a long time to create it!)

As part of Cyber Monday, I am offering this packet (along with Kicking Off the Year with Mentos) for 20% off Sunday - Tuesday Nov. 25-27th.

Let me know what you think if you purchase it! I am working on creating more reading passages that correlate with science standards for the future!


Comment:

Friday, November 23, 2012

Owl Pellets

Something about the fall makes me want to connect with nature.  You may have seen my previous blog about spiders...today, I'm into Owls...

I love to teach about owls and do so throughout the year.  We always read aloud "Owl in the Shower" by Jean Craighead George to bring to life the plight of the loggers vs. owl lovers in the western states.  It's a great books because it shows both points of view...as well as the point of view of the owl.

Today we watched a few You Tube videos to show owls and owl pellets. This is a great one from http://hookedonscience.org - a nifty little website I stumbled across this weekend.

Next, I introduced how to dissect an owl pellet using the website KidWings.  This is a great place to find instructions, worksheets, etc....as well as a virtual dissection option.

photo.JPG
I passed out the owl pellets and we went to town...notice, a few of my students chose to do it online rather than using the real owl pellets. I personally think it is a good idea to let kids choose which version they are more comfortable with and not make a big deal out of it!


photo.JPGphoto.JPG

I have several owl related products available for FREE or cheap on my TPT site.


Barred Owl Non-fiction (costs $1)


Another really cool thing I learned to do this weekend is create a QR code for my blog.  Scan it, and you can get to Science Gal on your Smart Phones!

qrcode.10091056.png


Comment:

Sunday, November 18, 2012

Spider Hunt

Boy did I have fun last week with my students in my after school club of "Green Hornets".  This club is for a growing population of students at my school who are "naturalists" at heart.  Have you ever noticed at recess the group of children that would rather look at the clouds, play in the bushes or trees, or simply pick clover? Those are our naturalists and they love the outdoors!

With all the research in the past few years that says that kids no longer want to play in the woods, I started thinking....why not?  Sure, some kids would rather play video games...but I still have a group of kids who would LOVE for us to let them play in the woods surrounding our school at recess.  And then I wonder....what about those kids who play video games??? Have they ever even been in the woods????

So...I asked one of our moms at our school (who is also a master gardener) to come to our recess time on Friday and offer some activities for the kids to participate in.  She has a growing number of kids who help her search for bugs, make leaf prints, create leaf blankets, look at stumps to learn about the weather, etc...


I also have my after school group.  Last week, we learned about spiders. I got my ideas from the  Handbook of Nature Studies blog.  

I started off by having the group eat their snack and watch some videos of spiders spinning their webs.

There are a lot of videos on YouTube with spiders spinning webs...very cool!

Then we looked at four different types of webs...

sheet webs


Filmy dome webs


Orb Web


Funnel Web


Next we went outside and searched for webs....we found some really cool ones!


The kids had their notebooks and were able to draw what they observed...


Then we came back in and listed what we found...we even snuck in the teachers lounge and found some cobwebs! 


We ended the time with big pieces of black paper and white crayons...the kids had a blast drawing what they saw!